Europa Games and Military History

Tag: second front (Page 2 of 11)

June 1944 – The Invasion begins

May had passed with a single sharp battle on the Mediterranean coast of Italy.  Two American corps with heavy support from Allied warships and air power went on the attack hoping to break the reformed German line. The Hermann Goering Division took heavy losses but successfully covered the withdrawal of the remaining German forces to the next line a few miles to the rear.

Clear skies and calm seas brought fear to the German headquarters outside of Paris.  A steady flow of newly arrived Panzer and Panzer grenadier divisions were placed in reserve positions inland from France’s North Coast.  Due to the massive disruption of the French rail network most of the newly arrived units were not able to make it all the way to their newly assigned positions.

At dawn on June 6 the first waves of paratroopers came in the troop carriers flying in dropping British and Polish paratroopers in a broad arc around Le Havre.  American paratroopers dropped further east blocking the routes the SS Panzers would need to take to respond to the landings.  The paratroop landings went far better than the Allied commanders expected with all the formations except a single British brigade coming down in goods orders and quickly securing their objectives.

At the western end of the invasion beaches disaster seemed to be unfolding as poorly suppressed coastal artillery caused horrendous casualties among the Canadian forces.  Only a single brigade of the Canadian division made it ashore intact, but crucially three brigades of British engineers came ashore right behind them.  Canadian and British forces aided by an attack from the inland side by British paratroops with massive air and naval support quickly penetrated Le Havre’s defenses.  In the confusion of demoralized eastern troops and shellshocked Kriegsmarine gunners the unthinkable happened, the order to blow the port never came.  General Montgomery preferred to ascribe the success to good generalship rather than good luck, but in any case  the Allies had something that had not bargained, an intact major port.

Further East the Americans clamored ashore destroying, a German infantry division caught in between the landing zone and the 101st Airborne. British Canadian and American amphibious tanks clanked in land to reinforce the paratroopers followed by motorized artillery and more tanks.  By the second week in June the Allies were well established ashore having successfully captured three ports, although demolitions effectively destroyed the facilities at Dieppe before they fell to the Americans.  Two Mulberries were successfully emplaced between the captured ports.  Massive aerial harassment prevented the Germans from sufficiently massing to counterattack.  A counterattack on the Polish airhead at the western end of the Allied lodgement was cancelled at the last minute.  A Luftwaffe bomber force managed to breakthrough to bomb the eastern Mulberry.   The results were disappointing with only one of the three bomber groups managing to hit its target.

In the second half of June the Allies aggressively expanded the easterna and western flanks of their bridgehead. The American bridgehead was massively reinforced with armored forces and struck out to the west.  The Commander German garrison at Treport  felt confident that he could contain the Americans.  His corps sized force included an excellent Luftwaffe parachute division and a regular infantry division supported by several battalions in a fortified position.  The size and power of the American assault came as a shock, hundreds of aircraft pounded the German defenses while the heavy guns of the Allies navies poured heavy shells into the German positions.  Next came the tanks, three divisions worth striking along the coast while two divisions of American infantry with strong support from engineers attacked further inland.  The German position soon collapsed with the survivors of the two divisions staggering back eastward while their supporting units disappeared in the chaos.

At the other end of beachhead the British and the Poles attack Deauville supported by naval gunfire and numerous ground attack aircraft.  A Luftwaffe Parachute division and a static division awaited the assault.  Soone the defenders found themselves in full retreat.  When they finally regrouped 15 miles to the west the division commanders found most of their units were down to half strength.

At the beginning of July two SS Panzer corps were in position to assault the center of the Allied beachhead.  On the map and looking at the orders of battle the SS commanders felt confident they could breakthrough the American position and threaten to split the American and British positions from each other.  At the same time the Luftwaffe would  make an all out effort to destroy the eastern Mulberry.  Allied airpower would crush both these efforts.  The SS found themselves pinned down along their start line by relays of Allied fighter bombers, most units never even managed to start their attacks, those that did were so uncoordinated they were unable to budge the American defenders.  After 24 hours the exasperated SS commanders called off the assault and  went to reorganize their troops.

The Luftwaffe flew into disaster.  They found themselves confronted by a huge force of ALlied interceptors.  Most of the escorting fighters were shot down or damaged.  The situation for the bombers was even worse as they were hunted down by P-47s, Beaufighters and Mosquitos.  One German bomber after another went down.  Only three bomber groups managed to break through to begin their attacks.  Only one made it through the fire from the newly arrived Royal Marine Flak brigade to deliver a successful attack.  Once the assault had ended the Luftwaffe barracks in Lille and Paris were virtually empty, only a few shattered survivors staggered to their bunks or were driven away by the ambulances to the base hospitals.  The Luftwaffe in the West had gone all in and it had been crushed.

Now there was nothing left for the Germans to do but wait to see where the next blow would land. .
Collapse of Fascism: Alternate rules for Italian Surrender in Second Front

In the RAW rules, a crafty Axis player can not only delay any Italian surrender check for an extended length of time, the Axis player can also control when that check is made to a much greater degree than would seem appropriate given the historical situation and record. This Fascist Collapse rule attempts to address both of these concerns.

Basically, the rule assumes that Allied ownership of Sicily is enough to trigger the sequence of events which lead to the overthrow of the Fascist regime in Italy. Once the Allies control Sicily [in game terms, once they own all ports and cities on Sicily and there are no Axis units there in regular supply] the Allied player may check for the collapse of Fascism in Italy at the END of any Allied player turn in which Sicily is controlled by the Allies.

At the end of each Allied player turn in which Sicily is Allied controlled the Allied player rolls a die, modifies it as appropriate and if the die roll is six [6] or greater, then Fascism has collapsed in Italy. The effect of this Fascist collapse is that the Capital of Italy is treated as having been captured by the Allied player – note that this is a Surrender condition and is treated, for the purposes of this rule [only] exactly as if the Allies had captured the Italian capital. Note that since Allied Control of Sicily is also a surrender condition [and must have occurred for this special house rule to have been implemented], if the Allies control Sicily AND have caused the collapse of Fascism in Italy then a surrender check will be made during the next Axis initial phase.

Note that this house rule ONLY affects Rule 38.B.2 and is not considered for purposes of Rules 37.G or 38.B.1. The effects of a capital being captured by the enemy player, such as morale, do not apply due to the collapse of Fascism.

There are two possible modifiers to the die roll for the collapse of Fascism in Italy:

each turn following the first turn that Fascism could collapse in Italy, a cumulative +1 DRM is applied to the die roll. So during Fascist Collapse 1 [i.e. the player first turn in which the Allies control Sicily] will have no DRM. During Fascist Collapse Turn 2, a +1 DRM would be applied, during Fascist Collapse Turn 3; a +2 DRM would be applied, and so on.
during any Allied player turn in which the Allies have more than 3 REs of units in regular supply in Mainland Italy, a +1 DRM is applied to the Collapse of Fascism die roll.

Example of play: The Allies control Sicily by the end of their Aug II player turn but have no units in regular supply in mainland Italy. This allows the Allies to check for the Collapse of Fascism at the end of their Aug II player turn. This is Fascist Collapse Turn 1. Since there are no Allied units in regular supply in mainland Italy, no DRM’s apply to this die roll and Fascism in Italy would collapse on a die roll of six [6]. The Allied player rolls a 3 and Fascism in Italy does not collapse. Assuming that the Allies still control Sicily and still have 3 or fewer REs of units in regular supply in mainland Italy, Sep I will be Fascist Collapse Turn 2, and a +1 DRM will be applied to the Allied player’s die roll at the end of their Sep I player turn. Thus Fascism in Italy will collapse on a die roll of five [5] or six [6] due to this turn’s automatic DRM of +1. The Allies roll a one [1] and Fascist Collapse in Italy does not occur. Still assuming Allied control of Sicily and insufficient Allied units in supply in mainland Italy, Oct I will be Fascist Collapse 3 [and there will be a +2 DRM to the Fascist Collapse die roll, Oct II would be Fascist Collapse 4 [with a +3 DRM] and so on.

In this example note that Fascism in Italy would collapse automatically during the Axis Nov II initial phase, since there would be a +5 DRM – even a die roll of one [1], in this case, would be modified to a six [6] due to the automatic +5 DRM. The historical situation would be that the Allies control Sicily by the end of their Aug II player turn. Thus Aug II is Fascist Collapse Turn 1 and the Allies are lucky enough to roll a six [6] and Fascism Collapses in Italy. The Axis would be forced to check for Italian surrender during their Sep I initial phase, since the Allies have fulfilled two surrender conditions, namely control of Sicily and having forced the collapse of Fascism in Italy. The Allied player rolls the die to check for Italian Surrender [as per Rule 38.B.2], rolls a three [3] and Italy surrenders.

The intent of the rule is to add another random factor into the procedure for modeling Italian Surrender. The Axis player should not be allowed to control when Italian surrender occurs [as he can now, to a large degree] and further, he should not know precisely when a surrender check will have to be made. The Allied player is rewarded for attempting to capture Sicily [as was historical] but he is also not overly penalized for not taking Sardinia and Corsica. As the RAW stands now, the Axis player can easily protect the Italian Army enough such that they will not suffer 50 REs of losses [a surrender condition] until after the Allies take Sardinia and Corsica – this pretty much insures that the first surrender check will be triggered not by Allied control of Sicily and 50 REs of Italian losses [as was historic] but rather will be delayed until the Allies control Sicily AND Sardinia & Corsica.

This sequence of events serves to severely distort the game as it stands now – the Allied player, knowing that he will not be able to inflict 50 REs of losses on the Italians in any sort of reasonable amount of time, is forced to invade and control both Sardinia and Corsica before any surrender check can be made. Corsica, in particular, can be a very hard nut to crack due to the broken terrain there, but the Allies have no real alternative other than conducting a campaign there. Historically, neither Corsica or Sardinia were taken before Italian surrender so it seems to me that we have to provide some mechanism for a possible Italian surrender that does not depend so completely upon the capture by the Allies of Corsica/Sardinia.

The house rule also makes a wholesale Sicilian Runaway defense less attractive to the Axis, since the loss of Sicily will not only be a surrender condition [as it is under RAW] but will also lead, ultimately, to the collapse of Fascism in Italy and thus another surrender condition. Thus abandoning Sicily without a fight is not quite the “no brainier” tactic that it is now.

The overall effect of the rule will be, I hope; that Corsica and Sardinia will no longer be the main focus once Sicily is Allied Control, abandoning Sicily will be less attractive as an Axis option, Italian Surrender will be somewhat more randomized and that the current situation where the Axis player can, in effect, control when Italian surrender occurs will be altered in the Allied player’s favor. Italy had historically suffered huge manpower and territorial losses by the time frame of the game and were certainly well on the road to collapse, if not teetering on the edge of surrender by Summer ’43. Mussolini was, after all, overthrown before the end of July and Fascism was on its last legs at this time. The rule assumes that Mussolini is deposed pretty much as happened historically[which happened due to the Allies successfully LANDING on Sicily, not controlling it…] and that Fascism does not long survive his fall.

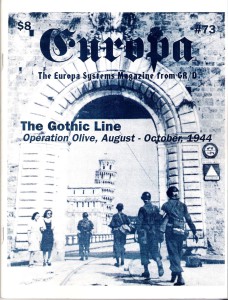
The Europa Magazine 73

The Europa Magazine #73 - Cover

The Europa Magazine #73 – Cover

(Vol.XIII, No.3, 2000)

Contents:

  • “Company Briefing: …and Behind Door Number Two” (Commentary) Winston Hamilton
  • “From the Editor: We Give Up – Sex is What Sells” (Editorial) Frank Watson
  • “Inside Europa: Second Front Q&A” (Discussion) John Astell (Second Front)
  • “Battlefield Report: Second Front Colorado Style” (Series Replay) Cory S. Manka (Second Front)
  • Europa Aloft: It Could Have Been a Contender: The Heinkel He 280” (Historical) Jason Long
  • Europa Aloft: Jet Powered Aircraft” (Historical) James A. Broshot
  • Europa Battle Scenario: Gothic Line – Operation Olive, August – October, 1944” (Scenarios) Frank Watson (Second Front)
  • “Battlefield Report: Playtest Notes – Gothic Line” (Series Replay) Chris Baer (Second Front)
  • Europa as History: Breaking the Gothic Line” (Historical) Frank Watson
  • “Orders of Battle: Gothic Line Axis OB Notes” (Designer Notes) James A. Broshott (Second Front)
  • “Rules Court: Second Front” (Discussion) Rich C. Velay (Second Front)
  • Europa Staff College: Coast Defense Strength as Artillery” (Discussion) Rich C. Velay
  • “Europa Staff College: Yet Another Second Front Amphibious Example” (Discussion) Rich C. Velay (Second Front)
  • “The Reader Always gets the Last Word: EXchange – Second Front Strategies” (Strategy/Commentary) Readership  (Second Front)


The Long Left Flank – Two short game reports

Introduction

At the Origins Game Fair this year, I attended a “War College” lecture on Market-Garden as a victory wasted. The speaker walked through 4 (of many) things that could have allowed the Allies to make it through Arnhem, but his real interest lay in what could have happened after that. According to his research, British planners weren’t really looking at going to the Ruhr, their next objective was the coast of the Zuider Zee, to cut off the Germans west of that.

So, I wanted to play Long Left Flank again, and see what Europa has to say about the operation. Unfortunately for half of my experiment, the scenario cuts off in November, so I cannot see what the German winter offensive might look like. I suppose I could play again, and extend it with using the Battle of The Bulge scenario that’s also in TEM. I ran out of time, so I will have to do that later.

First attempt: Sending the First Airborne Army against the Antwerp approaches

The scenario opens with the German forces scattered from their retreat from Normandy, and the Commonwealth forces mostly still in Normandy. I sent strong forces on the Sep I turn to assault most of the Channel ports, taking Boulogne, Le Havre, and Dunkerque. It is possible for motorized forces to reach Antwerp in exploitation, which I did, as well as Ostend. I flew the 52nd Airlanding division into Antwerp, in advance of the later airborne assaults.

Sep II 44

the Allied supply shortage came to bite, and only 3 corps were active. The parachute landings (0924, 0823, 0723) went smoothly, except for the 1 Para HQ, grabbing the Breda-Drodrecht causeway as the Rhine crossing. XXX Corps broke through from Antwerp, but the wily Germans massively flooded 0824 in the combat phase. (Fortunately, the scenario rule meant that I didn’t lose all of my Resource points.) Meanwhile, Gent was also taken, and its port was also intact. The islands were now cut off.

Oct I 44

The Allied forces fought into Rotterdam (port destroyed) and isolated The Hague. 0927 and 1026 were taken, clearing 2 of the 5 hexes remaining to open Antwerp and Gent. This turn, I unwittingly violated a scenario rule by using USAAF transports to fly in more GSP, so this playthrough is somewhat invalid after this point.

OCt II 44

The Germans tried a rare counterattack into the woods east of Antwerp, which succeeded in a DR on 3:2 odds! This didn’t quite isolate the Allied spearheads north of them, but it is closer. With (too much) supply, the Allies are able to make a lot of ground this turn. Even partial flooding on one of the peninsulae was unable to prevent its total capture. Only Walcheren island remains. Other Allied forces crossed the Albert Canal and drove east, exploiting all the way into the 2 northernmost (unoccupied) West Wall hexes!

Nov I 44

The Germans tried to get behind the rivers again, anchoring their line at Nijmegen. An attack into 1220 (West Wall) is a miserable failure at AH. Shouldn’t have attacked into a Mud turn! When the Allies try to assault Walcheren island, they are crossing water, into Mud, against a port fortification, when the island is partially flooded. Use of carpet bombing is effective, though—no short bombing. The result is a 3:1 -2, and they rolled an AS.

Nov II 44

With Mud on Nov II, and me realizing that I had given the Allies too much airlift on Oct I, I suspended the play. The Allies had a Decisive Victory (72 VP), holding 2 West Wall hexes and 5 hexes over the Maas-Waal, including Rotterdam. That wasn’t the drive to the Zuider Zee like I wanted to see happen, but it was fun to play, and the Allies looked to be in good shape for later attacks once their supply situation improved. Another assault on Walcheren would have to happen, I think I did not realize just how tough a nut that would be to crack. As a German player, I knew that next game I would work more on stuffing that hex with more defense factors. As an Allied player, I learned that I really didn’t want to risk any more massive flooding results!

Second try: planned for historical drop zones, except with swapped the 101st and British 1st targets.

Sep I 44

The Allied turn went almost the same as the previous one, except I didn’t try for the Channel ports, except Boulogne (port wrecked).

Sep II 44

The Allied airdrops had some nail-biting die rolls: The SS cadres reacted into the 101st’s drops at 0820 and 0920. The Americans were thrown out of the former, but held Arnhem on a DR roll! Praise to Allied air support! The British airborne rolled a DE at 1023, and the XXX Corps blasted 1024 with an exchange to cross the Albert Canal. With no Germans in the way, the 11th Armoured Division raced all the way to Appeldoorn. Breda was also uncovered, so the Allied breakthrough was 7 hexes long and 1 wide, with a branch through Breda to Rotterdam (port blown).
Meanwhile, the Canadians attacked 0927, but the German cadres escaped. Walcheren will be at 16 df when attacked later. They also captured Le Havre (port blown). The commandos and 1 brigade of the 49th Division landed on Schouen Island, taking that. Strategic airpower was used to suppress the CDs on Walcheren.

Oct I 44

the Germans set up a counterattack at Arnhem, but called it off when lots of DAS appeared.
The Allies again unleashed carpet bombing on Walcheren, this time before Mud hit, so the attack was an Exchange, without partial flooding. They also captured 0926, so Antwerp is clear. Amsterdam was captured from an unsupported SS regiment, port blown. DEs were rolled for Eindhoven and 0820, so more German cadres were heading for the replacement pool.

Summary

This game was an Allied walkover, I don’t think it could have gone any better. I played it until Nov I, when the weather was Clear, and wrote it off as an Allied Decisive Victory: over 130 VP when I stopped counting. While dice were clearly in the Allied favor this time, I probably didn’t play too well as the Germans. I suppose that’s a weakness inherent to solitaire play, at least for me.

Analysis

Sometime I will pull this out again, hopefully with a live opponent. I’d also like to mix it with the Bulge scenario, probably just exporting the Sixth SS Panzer Army to this front on the Dec I turn.

Going back to the original concept, it seems to me that once Arnhem is taken, going north the last 2 hexes to the coast is a good move. The Germans further west become no threat for a while, and there is nothing but clear terrain across the Ijssel River, either east towards Bremen or southeast to cut off the Ruhr. Sending the airborne forces into western Holland risks more flooding of hexes, so that seems less of a good thing. If one is playing the scenario, with the rule that Antwerp’s port is captured intact, then the Allies need to strain every nerve to get into Walcheren island before the Germans can stuff it with defense factors. Attacking it with forces quartered or eighthed looks like a bad bargain.

Oct 43 II

Mud in zone D, clear in E. Med Calm, Atlantic Rough.

Axis Player Turn

Italy surrenders on the first roll. All Axis units on Corsica and Elba are isolated. All Italians except a 0-1-6 Cons III on Sardinia (left behind to finish destroying the port of Ajaccio) and a 1-3-6 Lt AA X rearguard at Galipoli. The Italian fleet mostly goes over to the Allies, but then suffers Nazi Yahtzee dice and a great deal of it scuttles. German forces scurry around like cockroaches to man port defenses and get as far away from the Allies as possible. Strong Panzer and Panzer Grenadier divisions hold a line in along the 31XX hexrow attempting to hold the British on the toe for one more turn while their non-c/m brothers make for the first fortified line north of Napoli. Air forces position themselves to attack the remnants of the Italian fleet when it attempts defect. (The SF rules on this are a bit, shall we say, unclear, so I muddled through in true Royal Navy fashion).

When the Italians tried to defect (move to an Allied port) they first moved at night. There were 10 NTs and 5 points of TF left and the Luftwaffe attempted to naval patrol off the east coast of Corsica, well within range of many Allied fighters. Two NTs were sunk. Allied air losses were 1 RAF Spit9 eliminated and another aborted, a USAAF P-40 aborted. The Axis lost 1 RSI MC.205V eliminated and 2 Luftwaffe Ju88A4 aborted. Several naval patrols failed to make contact. The Italians move to Alexandria. Germany captures 4 points of TF and 2 NT. 267 AF of Italians are disarmed, netting 26.7 Inf RP. Those were all on-map. I still don’t know what to do with the Italians in garrison – do they get disarmed and count for replacements, or don’t they? Italian units that stay loyal to the Axis are: 1x 2-5 Para, 1x 2-8 Para-Inf, 1x 1-2-6 Inf (CCNN).

German transport planes are able to get into Corsica and retrieve the 8-6 Inf XX and several ants – Allied fighters are tied down defending the Italian fleet. These units will come in handy, very handy. The Axis is woefully short on units to garrison Italian cities, and the rail net is a wreck, so little help is expected from France short of a massive airlift.

Allied Player Turn

Three British corps nail German rearguard at 26/3216 with a 7:1 -3 attack (terrain, 1/2 AECA, full ATEC). LSSAH is cadred! US/British forces capture Btindisi intact (rolled a 6 on port destruction). British/French forces can’t catch the fleeing non-c/m units north of the German rearguard.

90th SS PzGren cadre is eliminated (isolated) on Corsica and Allied troops advance adjacent to Bastia and Calvi. The 44 HuD Inf XX is cut off and weak German forces remain in Calvi and Bastia.

More damage to the French, Belgian, Dutch, German and Italian rail nets. Very few repairs are getting done. Multiple cuts on each rail line block movement across the French-German frontier and along the North-South rail lines in Italy. Rail lines in France south of Paris and in Northern Italy are mostly functioning, but for how long?


Setup and Pregame Turn

Setup:

Axis set up with almost every ant in the WEST along with most of the better divisions stacked to the max along the French-Italian frontier rail lines. Forces on Sicily are cloistered around Messina, those on Sardinia around La Maddalena. Axis air forces are all in Italy, Southern France and Corsica, well out of range of Allied fighters. Axis anti-ship air units are concentrated in two large stacks at Roma and Napoli. The defense of France is entrusted to a single Panzer XX along with the 4-5, 5-5 and 5-7-6 Infantry XXs. Axis engineers are set to continue construction of the Atlantic Wall and the Winter Line across central Italy.

After covering their garrison requirements in Britain the Allies set up all but 9 fighters in the MTO. Many NTs are set up in the Mid and Near East loaded with troops. More are set up off map in Britain, also loaded with troops. About three-quarters of the LC are loaded with troops, though some are c/m and artillery.

Pre-game:

The Allied air force is left unmolested by Axis fighters to pound the rail net on Sicily, in the toe and to a lesser extent on Sardinia. The fighters in Britain score a single rail hit in France. Bombers take out the port at La Maddalena and place hits on all the ports in NW Sardinia and SW Corsica. It looks like Italian divisions will need their LC-ferry to get off Sardinia.

Aug 43 II

Axis Player Turn

Axis forces retreat up the Italian toe, destroying rail hexes in their wake. A sacrificial 2-3-2 Coastal XX is left in the mountain hex at 26/3922 to delay any Allied advance. Rail damage and harassment prevent significant movement of German ants to WEST. Italian engineers are airlifted to cities in the north that sustained RMY hits in Aug I, and this should help clear the rail. No response is mounted to the capture of Yeu. With two engineers on the island any minor damage would be easily repaired, and a major effort is out of the question as Axis air needs to stay concentrated in SOUTH. With so many Allied fighters guarding their two LC ferries to Corsica the Axis decline to interfere, but prepare their NODL and beach defenses.

Allied Player Turn

The airbase on Belle is augmented, a new one on Yeu is built, and several are placed in northern Sardinia. Allied LC make a mass migration to the ETO and end with 3x TF, 15x LC and ample NTs in the ETO. One LC is set up as a ferry at Yeu. Four British and Canadian Infantry XX and an Armored XX are broken down in Britain. Eight REs of airborne including all the components of the British Airborne XX are in the ETO. A British 8-8 Inf XX is shipped to Yeu, ready to take advantage of that ferry. US troops from Iceland land in the UK. The only weak link is Allied air power (or lack thereof), a measly 14x F, 1x A, 6x B-types are in the ETO now, but all Sep I Allied air reinforcements can go to ETO. Everything with range 15 or better can transfer between theaters using Yeu and Sardinia, possibly during the Axis Sep I player-turn.

Allied attacks net a measly 4 REs of Italians, and that count stands at 27. Allied units attack into Corsica via ferries and advance up the toe, reaching a line 26/3619-3618-3718. Allied air forces continue their anti-rail campaign with both MTO and one ETO strat air forces called up. Tactical air units can now reach the East Coast of Italy from Sardinia and concentrate on breaking rails in the middle of Italy. Allied air in the ETO seems to be isolating the Biscay-Brittany-Normandy region and the limited number of German construction troops will be hard pressed to do much about it. Rail into/out of the coast from Belgium to Le Havre is also kaput, Paris has four rail hits and the lines leading between Italy and France have multiple hits.

Commentary

So far the accountant’s defense is working like a charm. This doesn’t seem to be hindering the Allies much, and has not enticed them into precipitous adventures. But what will the Axis do to meet the threat posed in their WEST theater?


Nov I 43

Mud in zones C, D and E. Med Calm, Atlantic Rough.

Axis Player Turn

Luftwaffe night bombers raid Ajaccio losing a Ju188 to RCAF night fighters, but manage the one hit needed to shut down the port. Several Allied units will find themselves out of supply. Mud hampers the Axis retreat toward their fortified line and hinders the destruction of airbases and rail lines. Several c/m divisions break down to allow more MPs for the scorched earth campaign, then reassemble in the exploitation phase. Many Italian cities are still short their garrisons and engineers can only make feeble attempts at rail repairs, concentrating on getting a line open between Germany and central France.

Allied Player Turn

Axis find themselves short 8 REs of occupation forces in Italy, partisans make hay while the sun shines but are mostly ineffectual. (A total of 3 rail breaks in France and Italy this turn, though aircraft add another 17 rail breaks.) Very little Allied construction due to continued mud – one airbase upgrade on Yeu and 1 airbase dismantled on Malta. Mines are swept at the mouth of the Adriatic, opening up the Italian east coast ports to Allied ships and the beaches to invasion. British 5th Para X lands on an undefended Lagosta and is disrupted, despite using gliders. The Italian RM-1 Task force (strength 3) sails from Alexandria to Britain, rumored to be conducting mine seeping practice enroute.

The last flames of German resistance are extinguished on Corsica by strong US forces. The ports of Calvi and Bastia were overrun. 36th US Inf XX and its cadre are exchanged for the 10-6 44 HuD Inf XX in the mountains south of Calvi. The US player could’ve used a smaller c/m unit as part of the exchange, but the difference in RPs is slight and this gets the Inf XX off Corsica immediately. Unlike the isolated Nazis many US soldiers live on as special replacements. The 44 HuD is expected to be rebuilt on the mainland as soon as possible. Two French 1-5 Construction units are flown into Ajaccio to become the island’s garrison next turn.

On the Italian mainland Allies employ 4 TF and much air power to gain a 7:1 (-3) attack against 16th Pz XX defending the west coast road south of Salerno. They roll a 4 (-3) for a DR. A 2-1-R LR Siege Bn and a 0-1-6 Penal II are killed in the mountains. The ports of Taranto and Bari destroyed as Allied units enter them. Two French Infantry XX and the mighty 15-10 NZ Mech XX land and march toward the front. The Allies have now captured two connected marshalling yards and next turn can begin building rail capacity. Allied aircraft spend most of the turn bombing rail hexes. Total losses: Axis 19 AF (17 isolated on Corsica), Allies 9 AF.


June 1944 Special

C, C

Axis Player Turn

In Italy a few units slip into the mountain passes leading across into
France while the Arno line is strengthened. Theatre Command designates La
Spezia a National Socialist hero city and forms it into a western redoubt,
anchoring the line against the Allied advance.

In France around the allied beachhead at Cannes a slight withdrawal is made.
Toulon is abandoned to its fate with 2nd rate troops holding the fortress
while Marseilles is garrisoned to hold as long as possible. the cadre in
Lyon is strengthened by the arrival of a SS PzG XX and Tiger battalion while
the area around Clermont is abandoned as the Loire line is reinforced as
more and more infantry units arrive. Around the smoking beachhead on
Bolougne the Germans withdraw 16 miles to avoid a three hex attack on their
position to the boos and hisses of the watching allies. From Dunkirk, V-1
rockets scorch across the sky and impact into London docklands, requiring
Fighter Command to beef up its defences.

Allied Player Turn

Calais is assaulted by US infantry and engineers who destroy half the
defenders and force the remaining Eastern Troops to flee along the coast.

At Nantes a joint Canadian-British attack surrounds and destroys the
defenders, cutting across the mouth of the Loire and threatening Brittany.
Around Tours several attacks wipe out some German static units unfortunate
enough to be caught in the growing British advance in the region.
Stragglers around Clermont are gobbled up and spat into the dead pile.

A French attack across the Rhone west of Avignon fails to dislodge the
German defence, especially annoying is the Aborting of 4 GS aircraft by a
single LW AA unit.

The beach head around Cannes is expanded further as toulon is assaulted for
a HX result and the Paras push north west towards the Rhone over the broken
country side.

In Italy, caution is thrown to one side as the border is crossed from France
to outflank the German line.

In the mountain passes several defenders are crushed while Pavona is overrun
by the South African Armoured and other motorised odds and sods while a
Motorised 82nd AB XX attacks and seizes Genoa.

At Festung La Spezia, Poles, Kiwis and Brits attack the city and seize it
courtesy of some heavy GS flown by the USAAF. So much for the invulnerable
redoubt theory. East of Florence, Indian and Polish Mountain units force
back the RSI/SS defenders in the mountains while on the coast of the
Adriatic a US Corp treats harshly a joint RSI/PzG stack and blows it away
for a HX.

In the exploitation phase Milan falls to the Springboks with Mussolini
escaping just in time to take up residence in Trieste. The US 1st Armored
and 34th Motorised Infantry enter Ravenna before swinging inland towards
Bologna.

In France the Canadians advance to Nevers and the 7th Armoured to Dijon.
The bridgehead over the Loire is expanded near Tours and the 1st Armoured
enters Rennes while recon units enter an empty Brittany to seize some minor
ports along the Channel coast.

Feb II 44

Weather roll is a 2. Zone C is an N, which means more snow. Zone D remains Mud. Zone E is finally clear weather. Atlantic roll is a 6 for storms, Med is a 2 for calm.

Axis Player Turn

Very glad to get the Mud in D. Repaired 5 air units in the aborted box and the two 5-7-6 Inf XX coming full in the West go to beef up the rather lax defenses in Normandy. The Gustav line is straightened and now runs 26:2124-2123-2022-2021-1922-1920-1719, approximately the historical line. Allied units on Elba use special supply, New Zealanders and company in 26:2020 go U-1.

Allied Player Turn

USAAF is again short air units to garrison the Mid-East, -2 ARPs for that and -3 more to replace losses. The air cycle ends with the following ARPs unused: US 44, Brits 56, French 6, Italians 6, Allied anti-ship 8, Germany 21, RSI 5. Axis meet all occupation requirements, so no extra partisan rolls. Allied engineers rebuild Napoli’s port and remove port hits from there and Taranto. Other than shuffling the line forward over ground the Axis retreated from and a lot of engineers moving around/fixing things not much happens on the ground. Allied air forces continue to pound away almost without opposition on the Axis rail nets. Another 21 rail hits are scored between partisans and air units. British 11th Armored XX ends the turn in Gibraltar after embarking during the exploitation phase at Reggio.

Commentary

There really is no Axis rail net in Italy on map 26, nor in France within fighter range of Corsica, England, Belle or Yeu. Rail movement between Italy and France is out of the question, but a single line is open between Germany and France, though it doesn’t go far. The Allies get another increase in quality and quantity of air units next turn, and campaign season is not far away. It will be interesting to compare results of this 1943 campaign against the SF Apr I 1944 start data.

« Older posts Newer posts »