After the invasion turn, the Germans get a regular game turn, no restrictions.
The German’s continued to follow their plan: a strong force fought north and west aiming for the rivers just south of Rotterdam. Several overruns put them into perfect position by the end of movement.
In the center, almost all the German armor is consolidated into three corps, headed directly west, overruning whatever they could. The rest of the turn involved moving the supporting troops into position, forming strong infantry / artillery forces to follow the armor through any breaches they created.
And, the brave defenders of Liege were surrounded and, this time, there was no miracle … all were lost and the Germans rolled forward into Belgium.
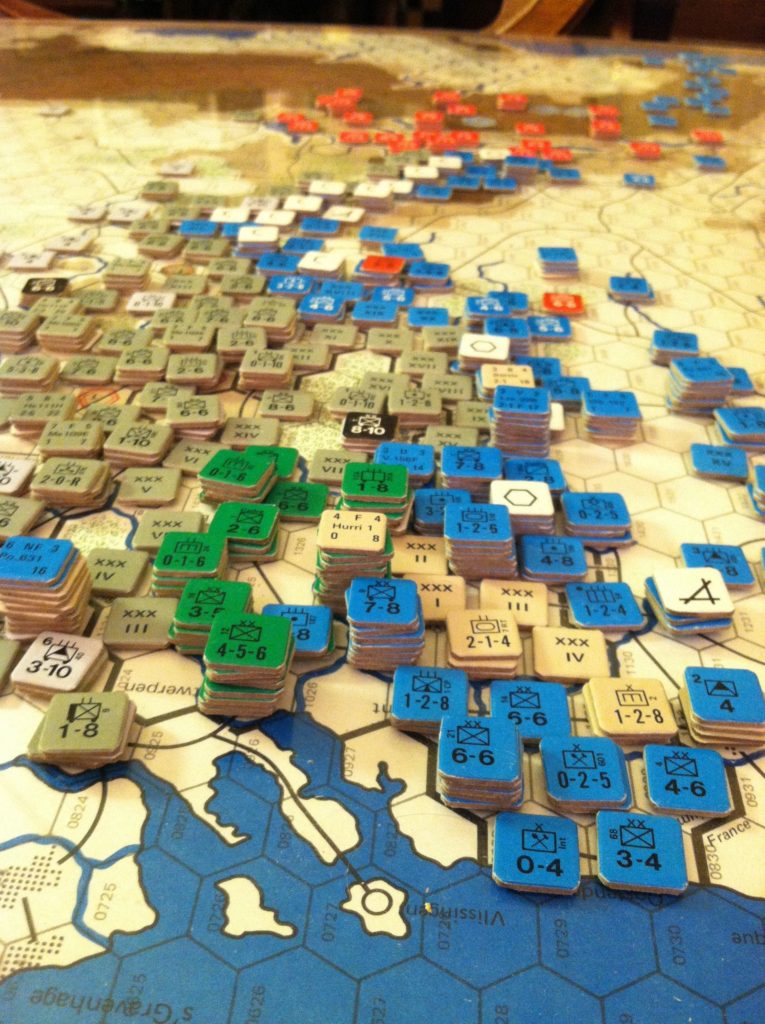
May I 40: the Benelux overrun.
More German divisions peeled off the southern West Wall and from hexes facing the Maginot line and headed north to join the Schwerpunkt … a mistake as we will see later.
The air phase was, again, brutal. German pilots concentrated on ground support again, piling in on the two key combats in the north that would secure victory over Holland, and on the defenders east of the Meuse that stood between the armor corps and their objectives.
The French and British fighters were positioned to fly some CAP and intercept, but at great cost, but managing to turn back and render inoperable a reasonable number of German air formations. Perhaps next turn will see a more strategic air war, but this turn was all about punching through the Allied lines and keeping them reeling backwards.
The German combat phase was a great success. Holland was all but isolated, only one hex left to pass supply. Numerous strong Belgian divisions and handfulls of non-divisional units were eliminated.
The armored spearhead reached the Meuse and due to the stubborn Belgians and bad terrain didn’t manage to breach that critical river. The combat phase ended with a wall of German armor, flanked by strong infantry divisions and backed by several motorized divisions lined up along the Meuse. Facing them were the fortifications of the French defenders.
The exploitation phase saw the last Dutch defender run-over and the steel trap door slammed shut on the Dutch supply lines. A few minor overruns in the center, more consolidation and readying for the big push next turn.
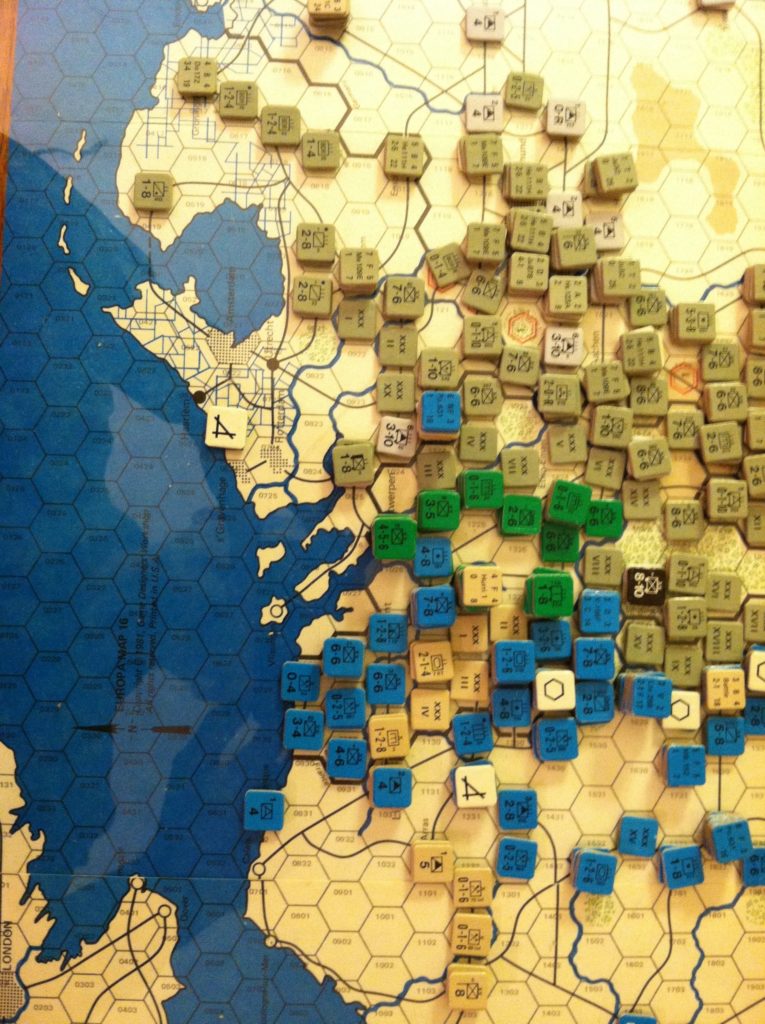
Battle for the Ardennes, May I 40
The Allied Supply phase was dramatic: Holland collapsed and the entire Dutch army (all out of supply) surrendered. A pause here: that must have been a severe blow to the Allies and it becomes obvious when you see it happen in the game. Simulation!
Allied movement is still restricted. Units that moved in the previous reaction phase (the entire British army and all the strong French motorized divisions north of Paris) cannot move. Only the Strategic Reserve can move full speed, the rest at 1/2 MP. And, due to the Blitzkrieg rule, if they do move, they attack at 1/2 SP!
All that said, the French pulled units from near and far, using the excellent rail net, and shored up the defenders along the Meuse. A second line was formed up in front of Paris and even some troops sent directly to Paris to start a defense force.
THe game allows for North African troops to be siphoned off and sent to defend the homeland … 2 infantry divisions (6 regimental equivalents, the limit per turn) embarked and will arrive next turn.
At the northern edge of the Maginot Line the French generals spotted a German stack that was a bit too far forward, and was already partially surrounded. Several divisions were sent to build an attack, along with a considerable amount of railroad artillery.
The Allied air phase was interesting: about 3/4 of the Allied planes flew defensive missions over their defenders along the Meuse … they will remain in place through the next German combat phase and add their Tactical Bombing Factors to the defense strength.
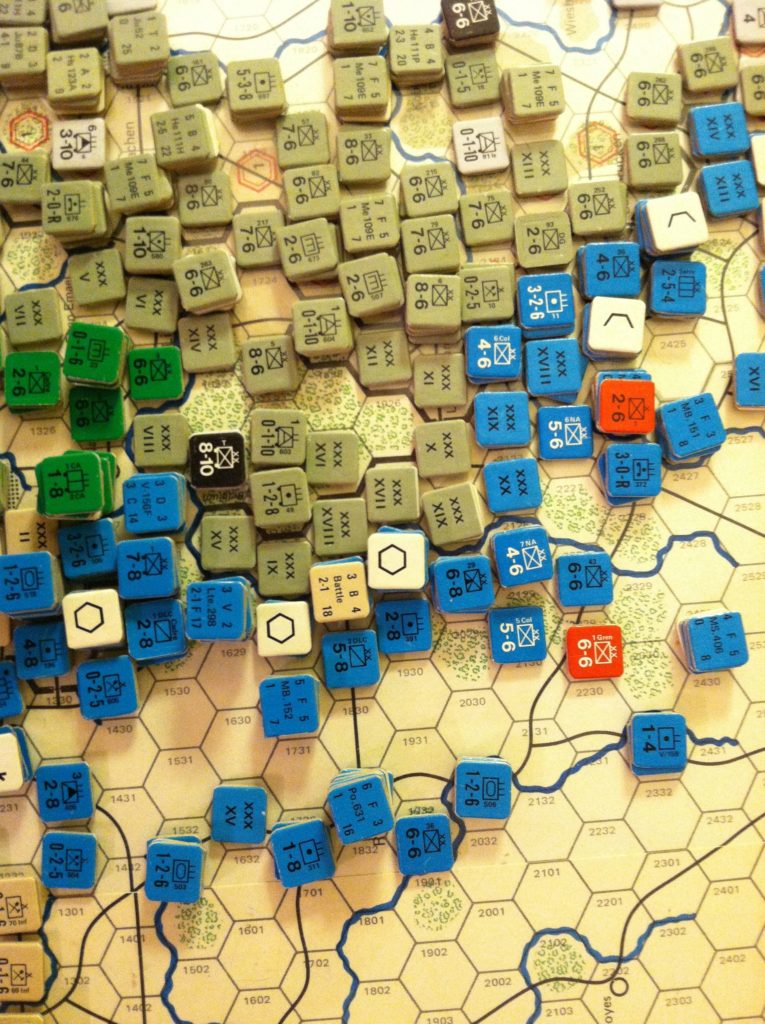
View from the North: May I 40.
The rest of the air units got aggressive, braving CAP and fighter interception and flew air base bombing missions, hoping to take out some of the mid range German bombers. Also, the Allies have a lot more night fighters and bombers which cannot be touched by the regular air units. The value of the British Air Command, long range night bombers based in London, became apparent.
The Allied Combat Phase was brief but dramatic. The two attacks went off well, one resulting in a DE (defenders eliminated unless they have a reduced side, in which case they flip and retreat) and a DH (1/2 the defenders are eliminated, an equal number of attackers and the rest retreat). A German division eliminated, and several more reduced to Cadres! Not much, but a real morale boost.
Finally, the Allied exploitation phase was minor, seeing some repositioning of the armor and motorized units to best leverage the armor / anti-tank defensive bonus.
Leave a Reply